
[ad_1]
Recently, Google glasses were launched. It looks similar to ordinary glasses, but it consists of special transparent glass. This special transparent glass gives you the UI and works like a smartphone that displays news, time, books, and much more information that you want to receive in front of your eyes. You can also view the surroundings similarly to ordinary glasses. The text appears as an overlay or “floating in the air.” It’s an amazing technology. These Google glasses are revolutionary and will become one of the most advanced gadgets in the future. Since these smart Google glasses are available in limited editions and very finite in numbers. As it is very expensive, it is difficult for most people to experience such technology. Hence, we can design our own Google glasses.

The following are the components required for designing smart Google glasses.
Bill Of Materials

Coding
Now, to design Google eyeglasses, prepare the code to show the data information on the transparent OLED display. Now, we need Python programming to create a code for interfacing and configuring the OLED display. The latest version of Raspbian OS installed comes with Python 3 preinstalled. If not, then install Python and its IDLE first. Now install the libraries and modules for interfacing the display, and also install other python modules and libraries as per the functions you want on your google eyeglasses design. Here is the simple reference design of Google eyeglasses that displays time and text information on eyeglasses. So, to install the Python modules, open the Linux terminal and run the following command.
wget http://www.airspayce.com/mikem/bcm2835/bcm2835-1.71.tar.gz
tar zxvf bcm2835-1.71.tar.gz
cd bcm2835-1.71/
sudo ./configure && sudo make && sudo make check && sudo make install
sudo apt-get install wiringpi
#For Raspberry Pi systems after May 2019 (earlier than before, you may not need to execute), you may need to upgrade:
wget https://project-downloads.drogon.net/wiringpi-latest.deb
sudo dpkg -i wiringpi-latest.deb
Check the installation using the following
gpio -v
Install python modules
sudo apt-get install python3-pil
sudo apt-get install python3-numpy
sudo pip3 install RPi.GPIO
sudo pip3 install spidev
Now clone the transparent OLED Python library and install the library.
sudo apt-get install p7zip-full
sudo wget  https://www.waveshare.com/w/upload/2/2c/OLED_Module_Code.7z
7z x OLED_Module_Code.7z -O./OLED_Module_Code
cd OLED_Module_Code/RaspberryPi
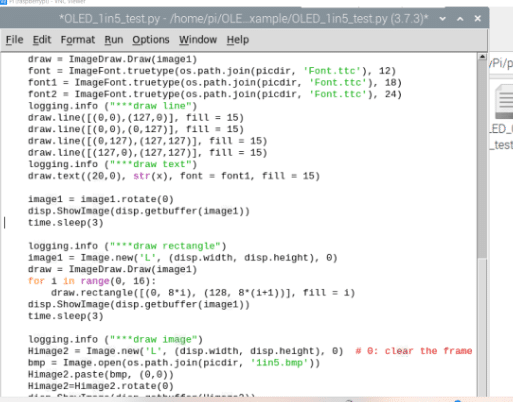
Now start to code
First, import the Python modules and libraries. Here we have imported the DateTime library and OLED display modules and library. You can also import many other libraries and modules if you want to add any more functions to eyeglasses.
Next, we will display the text like book text, or info and time on a transparent OLED display.

Connections
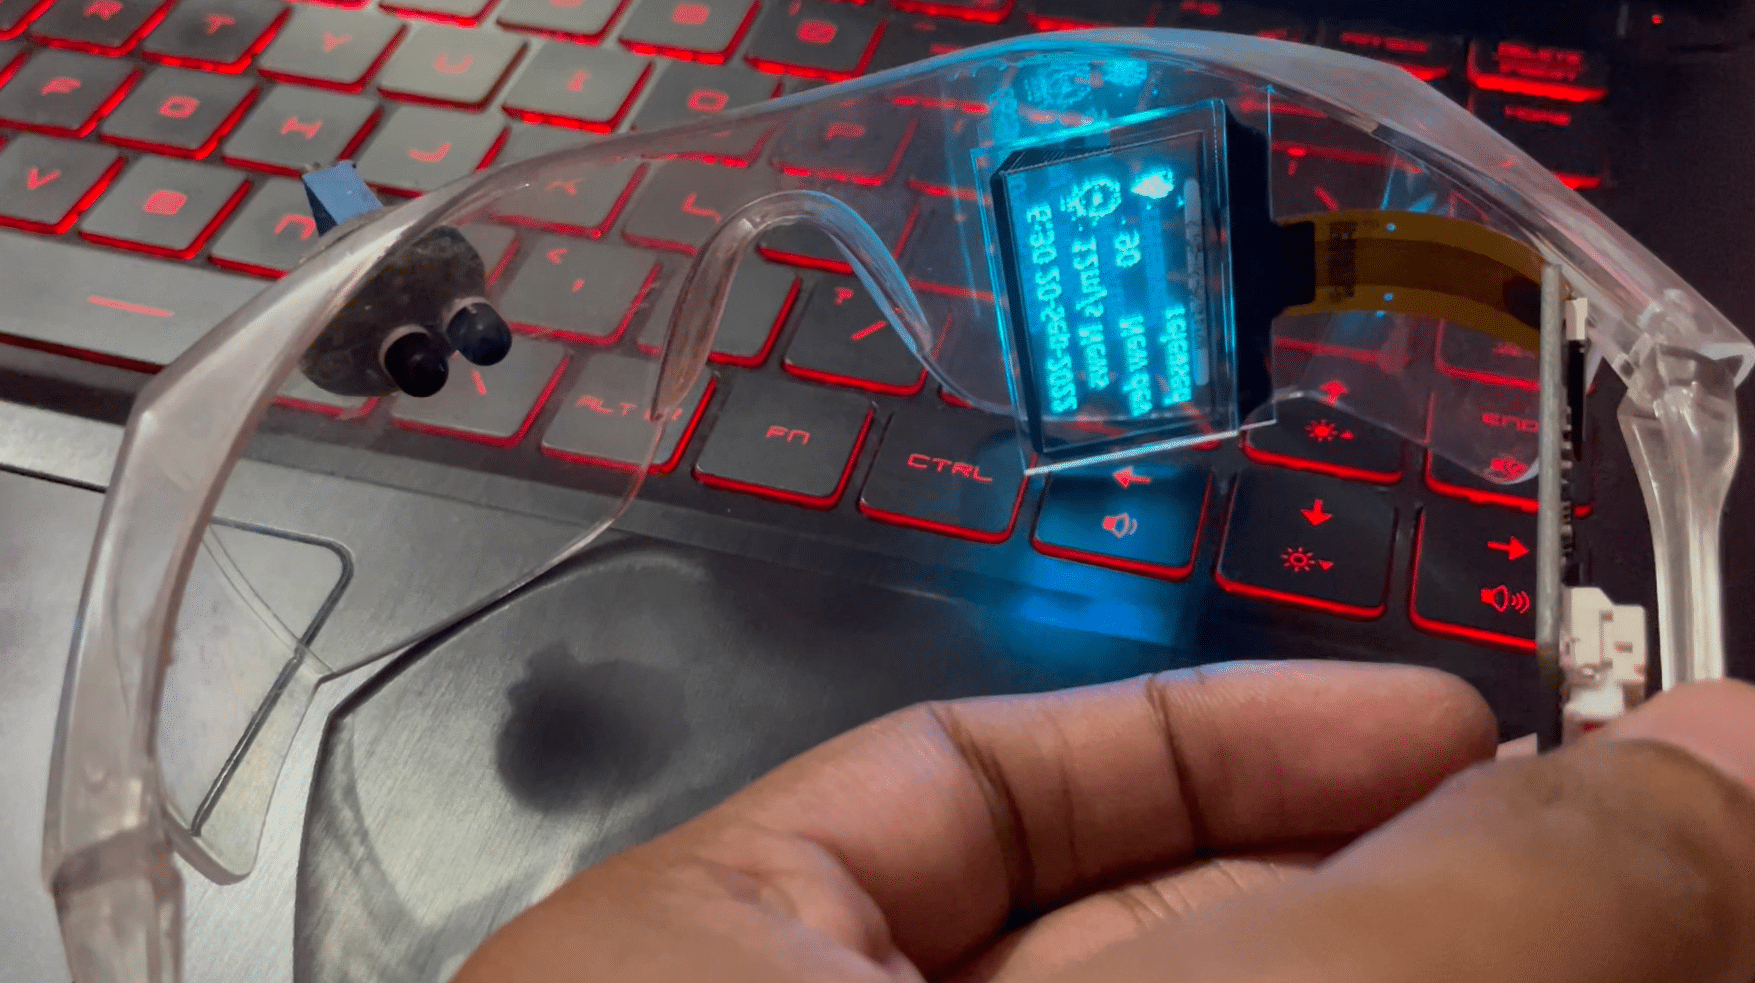
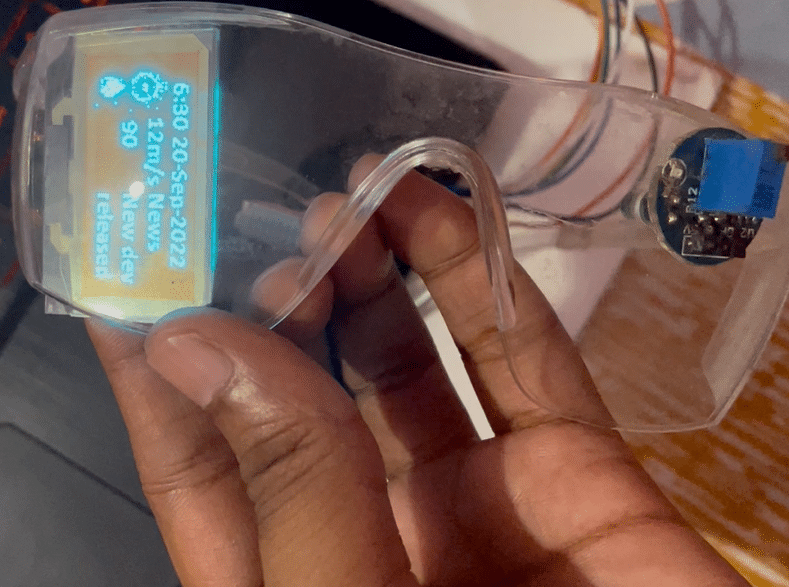
Now connect the Raspberry Pi and set the Transparent OELD display as shown in the circuit diagram below. Place the Transparent OLED display glass instead of single glass in the eyeglasses and then mount the Raspberry Pi and battery inside the eyeglass as in pics below

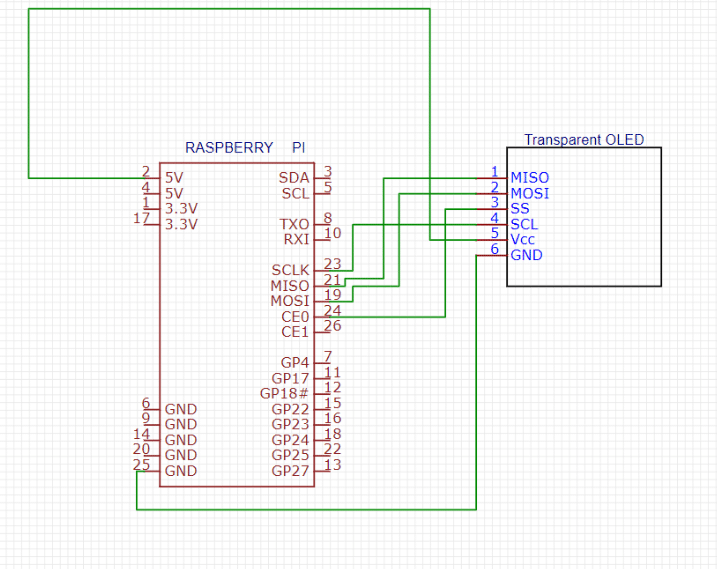
If using I2C interface then connect the DIN pin to SDA of RPI board and SCLK to SCK pin of RPi board.
Testing
Note:- This is the first version of the project we will continue the project and soon publish the next version with more features like controlling the display using eyes and getting notifications from the phone.
[ad_2]
Source link


